Wednesday, October 24, 2018

How To: DIY Silhouette


                         Simple DIY Project

This is such a simple easy project and one you can get your kiddos involved in making these as well.

You will need:
Watercolor paper(thicker paper)
Acrylic paint
Brushes(can be super cheap)
Pencil
Camera and somewhere to print the picture on basic printer paper


Step 1:
Take photo of your subject

Step 2:
Print out on 8.5x11 paper. Nothing fancy. Just make sure your print setting say "Fit Paper" or "Full size" this will give you a larger print out and not a typical 4x6

Step 3:
Cut out picture

Step 4:
Trace on paper

Step 5:
Use paint to color in subject

Step 6:
Frame


Thursday, April 19, 2018

My Amazing Cousin: Travel With 5 Kids Using Only Backpacks


I have an incredible cousin who has five kids(4 girls and 1 boy, just like me!)
She has always inspired me to travel and have fun with my kids. Last year she traveled
to Europe with her kids and they did it all with backpacks! This year she has another
big trip and I loved learning how she does her packing She was willing to share some
pictures and answer some question on how she accomplishes this big job and
simplifies her traveling so she can enjoy her trip more with her kids.

The last year few years we've traveled to Florida for a week and accomplished it
with only backpacks. This year we'll be doing California and doing backpacks again.
It is amazing how it simplifies traveling, no waiting around for luggage, no worries
about lost luggage and kids can normally carry their own bag. I think it's a huge
help if you're changing accommodations too.

Maybe one of these days my counsin and I can do a trip with all our kids together.
That would make quite a site. 2 moms + 10 kids with only backpacks:)


Amber: How long are you traveling for?
Nancy: 22 days


Amber: What types of activities will you be doing on your trip?
Nancy: Activities include sightseeing in big city so lots of walking and parks for
playgrounds of Vancouver. Hiking a bit in mountains around lake Banff.
Alaska cruise panning  for gold in little creeks/river , touring port towns,
possibly visiting glaciers. Pools possibly on cruise boat.


Amber: How many adults, how many kids(ages)?
Nancy: How many adults and kids All of Canada there is 3 adults
5 Kids Emma 17, grace 13, Kennedy 10, Charlotte 5, Nicholas 18 months.
Alaska cruise Dan heads home and it’s a girls trip plus Nicholas


Amber: How often do you plan to do laundry while traveling?
Nancy: Total length of trip is 22 days so we plan laundry approx every
7 days local laundromat. So twice during the trip. Spot clean if needed
in sinks and hang to dry in room


Amber: Do you have your kids wear once and then wash or wear
until they are dirty?
Nancy: Kids wear clothes approx 2-3 times each. Depending on spills and dirt.
This trip has cool climate so they don’t sweat as much. I’d take a totally different
type of clothing to Caribbean. More dry fit stuff for that kind of trip


Amber: What types of layers do you pack?
Nancy: All things can be mixed and matched. Every single piece goes together
no matter the combo. Can layer leggings under the dress or the jeans if needed.
Shirts can also layer or cardigan over shirt then the jacket for warmth. Jacket has
a hood and is water resistant so good in case of rain. Jacket also folds up into its
pocket so when out exploring we use 1 backpack to take jackets in and pull them
out as needed
Jacket is from Land's End called a Packable Primaloft and it's on sale right now!


Amber: How many outfits?
Nancy: How many outfits. So 3 shirts 3 bottoms potentially 9 outfits not counting
layering leggings under the dress for a new look which makes 10 outfits you can
make. Pants and leggings can also be rolled to make capris if it’s warmer


Amber: How many underwear, socks, pjs, shoes do you pack?
Nancy: pack 7 underwear 7 socks 2 shoes 1 pj. A tennis shoe and some sort of
sandal probably some sort of crocs for this trip. I plan to spray tennis shoes with
waterproof stuff because Vancouver gets a lot of rain.  Also the reason for the crocs.
Lots of rain


Amber: Are there any extra things you pack in your backpack that the kids use?
If so, what items and how much?
Nancy: Extras is a biggie. My bag and my husbands and oldest daughters bags
carry extras.
We carry the:

toothpaste 1-2 tube travel size
Leave in conditioner
Lush foot powder amazing for smelly feet!
Deodorant travel size
Makeup and face wash
Brush and hair ties
Sunscreen travel size
Travel documents
Passports
Sunglasses
Wallets
We use hotel shampoo and conditioners and soaps and use leave in conditioner
to help with tangles from not great shampoo. Also I may take baby soap for the baby.
I have organic soap pieces instead of liquid so no spills and smaller. If we run out
of toothpaste we get it from hotel as we go or grocery store. Diapers and wipes.
I only take enough to get me there and through first night. I buy as I go so never
have to carry a ton.


Amber: Do your kids hate only have a few things to wear?
Nancy: Kids have no problem wearing same things. It’s easier on them and
me because there is no other options. It’s all they have.


Amber: Have you always been this way with packing?
Nancy: No haven’t always been this way with packing. The more kids I had the
more hands I needed and it became necessity. I can’t carry and move 5 tons of
luggage. Also depending on travel arrangements last year we did a ton of train travel
in Europe with quick changes of trains up and down stairs and platforms. It’s too hard
to move even small rolling luggage for 7 people and not forget one. Kids carry their
own backpack and I have hands to strap baby on and carry my own. Also I take a
stroller still.


Mesh Bags from Rick Steves


Backpack is a 31 One and the first time she is using this style.


Tuesday, April 10, 2018

Before & After Closet Makeover

Every mother I speak to says that the greatest encouragement is seeing how other mother's lives are transformed by minimizing the amount of stuff they deal with every day.

I recently had a mom come over to see how my closets look, and believe me they are far from perfect and I'm always looking for ways to improve. But I know being able to see the simplicity helps us to be able to realize that tackling these projects is worth the effort and it's possible!

Here is a before and after of someone from one of the Mother's of Preschooler's Groups where I spoke recently.

Amber T. "I actually went through the clothes 2-3 times. The first time I went through them, I got rid of anything that she hasn’t worn all month, had a stain, or was getting tight. The second time I went through them, I had my sister help me. Having a second set of eyes REALLY helped! And then, once I had all of her clothes cleaned and hung up, and the closet organized, I went through them one more time ðŸ˜¬"


Friday, March 30, 2018

Girls, friends, and getting along

One of my daughter's had a moment the other day. Every woman knows about those moments when girls are getting along great and then the next they hate each other. We had friends over and of course three girls wanted to play something and one girl didn't want anything to do with it. Two out of the bunch attempted to include her but she didn't want anything to do with their plans. As the mom I discovered later she went off by herself to play with the cat with the hopes that some how the other girls would miss her, beg her to come back, and then miraculously without her saying a word would know what she wanted to play and what she was feeling. That of course didn't happen and she resorted to going to her room to feel sorry for herself.

I know every woman has been there. The moments when everyone is doing something you have no desire to do. The times you just don't fit with the group. The moments you can't relate to anything they are doing or saying. We have choices to make at those times just like my daughter did. Sometimes we sulk around hoping someone will notice, or maybe they'll finally include me, or maybe they'll miraculously want to do the things I like doing. The fact is that is rarely going to happen. People are not mind readers and most often they are busy with their own projects, worries, and concerns that they aren't even aware of your struggle.

I told my daughter that there is nothing wrong with not wanting to play what everyone else is playing. BUT, you have to give people alternatives. The game of give and take. Life doesn't always go our way with friendships. We give a little, we take a little. I shared with her that in the end you're never forced to play with anyone. We all have choices in relationships. In this particular situation with this child I knew she was more embarrassed by how she responded and she didn't want to go back to playing and have everyone look at her. I told her it was time to wipe her eyes, accept that it was ok to feel embarrassed and know that the longer she took to resolve the problem the more embarrassed she would feel. I told her there are times we have to choose to be kind even when we don't feel like it. This particular child struggles with expressing her thoughts to others. She'd rather have people guess what she is thinking. This was that time to help her realize that in order to have friends she'd have to give a little, but also learn to express her needs and desires to others. Sometimes as women I find in our friendships we don't often express our needs to others in our relationships. We just get frustrated that "nobody gets me", when in reality no one even knew they weren't "getting you".

This was a reminder to myself that with relationships it's ok that sometimes you just don't "fit". In life we have to find friends where there is give and take. If we're always in situations where it is all take and no give we become dry and drained of energy. One day at a time I'm learning there are times to let go of certain relationships that aren't beneficial and there are times when you know your place is to only give. The goal is finding that balance. I'm slowly learning to accept times and places in my life that certain relationships aren't my fit. It doesn't make those relationships bad, it's just not where I belong.

Just as I encouraged my daughter to not become frustrated with those not wanting to play her game. In my own relationships I'm learning as well that there is a time to keep and a time to let go. We have to teach our daughters to let others be themselves and if that isn't the game they want to play then find the people that do want to play your game but never become frustrated with those who are not like you.

Saturday, March 10, 2018

Before & After Closet Make Over


One of the mom's that attended my Organizing Outside The Box session is allowing me to share her before and after photos and what she learned along the way.


Notes from Trisha D: I only used her pink plastics hangers, looks so much neater. I really just thought “if I’m not using it I should donate it” she is our 3rd child and we are not having anymore. I would definitely suggest when your kids outgrow clothes don’t save them and let them pile up like I did. I had from birth to 3T and it took me forever to match up outfits and bag according to size. I wanted to make it easier for the Foster Closet to go through. I’m going to be donating right away when she outgrows clothes from now on. This was so much work, but I feel amazingly accomplished today. I did my own closet this weekend. I’ll post pics later ðŸ˜‰. Thanks for all your tips Amber. They are really helping.


SO much more space!!! Easier to find things and much easier to keep up on laundry. Way to Trisha D!

Monday, March 5, 2018

Bathroom drawers....Spend 30 min Today!

Bathroom Drawers:


It’s amazing what collects in the hidden dark corners of these cabinets. In fact I’ve cleaned
mine out before Christmas and if I check them today I'll probably find that needs to go.
Kids(and even mothers) love to hide all sorts of treasures in these cabinets. Expired items,
pregnancy tests, tampons brands that I hate and don’t use, toothbrush drawer that has pink stuff
slimed all over it, and nail polish that doesn’t work, and face creams I forget to use. 
Time to clean it out!!!  Remember set your timer for 30 minutes and then stop. Tips:


  • Find any expired items and pitch them!
  • Determine whether your kids need new toothbrushes and get rid of the old ones.
  • Toiletries: determine whether you need them and if they even work for you
  • Anything you haven’t used in the last 6 months you probably don’t need
  • If you keep medicine in any of your drawers please get rid of anything that
doesn’t work for you or is expired
  • Determine what things are ending up in the cabinet and if they SHOULD be there.
  • If they SHOULD be in the cabinet create an organized space for it.
  • Come up with a basic cleaning supply list if you keep your bathroom supplies in the cabinet.
No duplicates, just the essentials. Example: 1 toilet bowl cleaner, 1 shower cleaner,
1 floor cleaner, 1 cleaner for counters(sometimes you can even use the shower cleaner
for your sink and countertops depending on the sink/countertop material), 1 mirror cleaner product.
At the most you should have 5 products….no more :)

Wednesday, February 28, 2018

Kitchen Update

Here's a few pictures of the kitchen progress on our remodel. Still a few more projects to go, but it's getting there! I hope to post my DIY pot rack and shelf I made that is going on the right side of our stove. After this crazy week of speaking in three different places and my husband speaking twice this week I should hopefully have some time to finish up this project :)


Pantry with our barn door. Found a great price for the hardware on Ebay. Love how my storage over the fridge is inside our pantry. Save us from spending money on a cabinet too :)                                        Love our backsplash tile. It's a great statement piece and fits with our cottage/farmhouse. Super easy to install these 18"x18" tiles that we purchased on Wayfair


Love my wall art over our fireplace from Smallwoodhome.com 


The ten-item wardrobe | Jennifer L. Scott | TEDxStGeorge

Minimizing the Wardrobe!...where to start

Here are a few tips I shared yesterday while speaking at a Mother's of Preschoolers group....


BABY STEPS with CLOTHING


  • Box things up - don’t give them away until you have a good plan


  • With younger children pick things you like


  • Older children: have them help you select the items they keep out


  • In Michigan think in terms of layers - short sleeves can be used in the winter

  • Once you take the leap you begin to feel the freedom

HIGHLY RECOMMEND WATCHING

Monday, January 22, 2018

Decor has meaning...


Mixing old with new...wooden brain teaser mixed in with a table center piece. 


Most women find themselves in the clearance section finding little things to put on shelves, trinkets for a table and something to put on a wall. Unfortunately, that means whatever was popular 6 months ago defines what is significant to you. Our decor should reflect meaning and significance. We should be surrounded by small reminders all around of us memories of days gone by, of things we cherish, hobbies, and above all else the things we love. 

Why a dog, teapot, and horseshoes? Sort of a strange collection of items. Yet, they all go together. My grandmother's teapot that reminds me of afternoon teatimes with her. The horseshoe is a brain teaser. You'll find brain teasers throughout our home. My husband is a huge fan. I keep them in fun places where guests would sit. Kitchen table or island, coffee tables and even sometimes in the bathroom. Last is an antique Newfoundland dog nut cracker. I raised Newfies for many years. 


Nate Berkus put it this way in an ABC news article "I think things do matter," he said. "Obviously people are important. They're more important, but things really do matter. They're what we touch every single day. They're what we surround ourselves with." 

And sometimes you just need a few new things that give you a chuckle and tie things together. This little piece of art work gave me a laugh because this is SO ME!


I have yet to read Nate Berkus' book "The Things That Matter".  Next on my Amazon purchase list :) 


Sunday, October 8, 2017

Statement walls using art


One area that I've found I've worked with clients is that many people are lost when it comes to hanging art and photos. A few things happen.


DON'T's

1. Gunshot style: this is where you place frames that are too similar in style and size in spot on a wall and it looks like a huge bullet went through your wall. It looks like you didn't know where or why you put them there. There is nothing for the eye to follow and there is no variation and in color, size, etc.

2. Splat: this is where large framed art is just randomly put in your home without any thought of framing the large art with either smaller pieces or furniture.

3. Overload: this is where you just generally have too many things on your walls. It's ok to have some empty spaces :) You don't need a gallery on every wall.


Here is a link that has some excellent ideas when working with wall decor. Little House of Four is a great resource for ideas and inexpensive ways to do things for your home.

Here is a picture of my "gallery" I'm working on, still have a few more things to add to it. These are vintage photos of my relatives and I've included a clock since they all have to do with time past which is my theme for this wall. I've also included a coat of arms in my gallery that my grandmother use to have hanging on her wall. In the photo at the top of this post is when I was able to pull a few more things out of storage and start to add something that would help frame the chair I have to the side. I added a small ceramic plant stand and put some antique books and a candle.


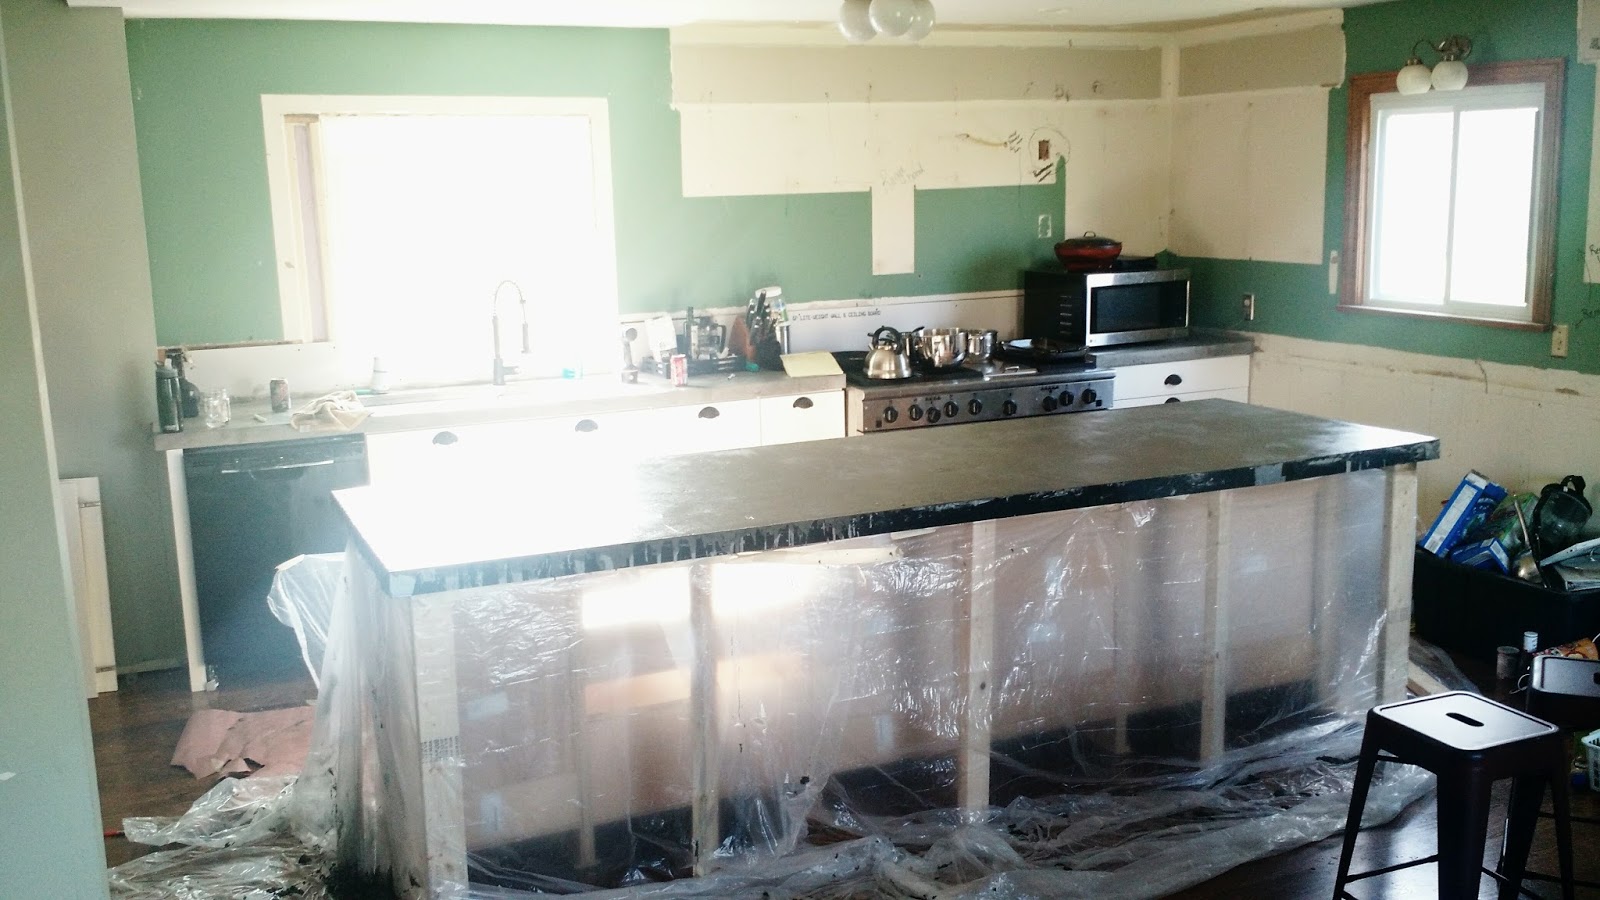
Part 1 Concrete Countertops using Concrete Countertop Solutions and Z Counterforms


Concrete = Awesome!


Initial Planning:

When I began the process of designing our kitchen durability was top priority for the counter tops. Next priority of course was budget :-)  I was initially looking at Carrara Marble. Loved the look for BUT.... The draw back was the problem of staining. 4 young kids and marble probably wouldn't fair well over the years. I loved the thought of some wear and tear but didn't know if I would panic when grape juice got left out and made a ring on the marble ;/

Concrete: I had seen other people do concrete and read lots of reviews. It appeared durable but those who tried it with out a professional seemed to have issues. Many people create moulds, pour and then set the pieces in place. That looked a little too overwhelming to me(too many variables that could all go very wrong!).

I came across Concrete Countertop Solutions in my research. The reviews were good and the youtube videos they had were excellent and very helpful to see how easy it might be for the DIY'er.

Their customer service is AWESOME! They respond to questions normally within a day by email.

Tools:

Screeds: A screed is important for the first initial pouring and smoothing of the concrete. You can get a screed at your local hardware store. We purchased their Island Screed  for our 10Ft x 3ft Island. This was not needed and since the screed was only 40in wide we only had 2 inches on either side of the Island to move it back and forth(watch Concrete Countertop Solution videos on how to do this). We had the problem of the screed falling back into the concrete. I would recommend creating your own screed with a 2x4 for larger areas and don't waste your money on this one. My Island ended up having a little more rustic look to it than I had anticipated.

Drill: Make sure you have a drill that can be used to mix concrete. We burned up the first drilled we used :(  We ended buying a Bosch that is made for mixing and then bought a mixer bit. If you have a friend you can borrow one from that is even better!

Trowels:

A Magnesium Trowel is needed for the first troweling step. PLEASE watch Concrete Countertop Solutions videos on troweling. I watched them probably at least 25 times before attempting this. This float can be purchased at Home Depot as well.

Steel Trowel is much cheaper at Home Depot than through this company. I steel troweled too early on my countertop and had some issues with my stain and sealer sticking. So please make sure you watch the videos and don't do it too early.


FORMS:

We chose the square edge form since I wanted a more basic and simple style. Forms were very simple to take off. Had to give it a little muscle to get it off but overall very pleased with the forms. We had some bubbling holes where we didn't get all the air out of the concrete with tapping as they suggested in their videos. We liked the more natural look so we kept them.

The sink form video was helpful except that it was for a sink with slightly rounded corners. Our sink was a 42" sink(see review on the sink we chose) with tighter corners it was a little more challenging to get the work to stick to our sink. We used a broom handle to help bend the plastic so it would fit tighter in the corners.


In this picture you can see where the side of the cabinets on the ends touches the walls(not the back)


Side walls: Here is where we couldn't find any info on what to do with this wall whether to use the back forms or whether to put the concert right up to the wall. If you're putting backsplash on then you can use the back wall forms but if you're leaving it just drywall don't use the forms. I'll need to get creative now on the sides of my counter top edges because I have a black form showing :/


I'll be posting about these tools in part 2
Reinforcement
Sanding
Stains
Sealers


Backsplash and Range Hood Coming soon!

Thursday, June 22, 2017

Review: DIY Shanty 2 Chic Farmhouse table


Finally got my farmhouse table and bench done from Shanty 2 Chic . One more bench coming that will be used in our mudroom and then pulled out in case we have extra company. 


Size:
A few thoughts on the plan. I opted to make mine a bit longer by not cutting the 1x6x8's that are used for the top of the table and benches. This gave me a few extra inches which I wanted for my dining room. This is a very large table so make sure you double check your dining room space. Since I made mine larger we figured we can probably fit 12 people at a minimum at this table, with children you could fit a lot more. 

 
A few suggestions:

I didn't use standard 1x6 for the top of the table since I wanted a nice smooth surface for cleaning. Four young children and food don't mix well with cracks and crevices in a table. Using standard boards will look more rustic but is terrible to clean with kids. I opted to use Menards' Select boards. The price is significantly more(about $8 a board). You can see the price difference by clicking here


Total cost:
Total cost for table and two benches(including all the pocket screws is around $300). This price doesn't include needing to buy a Kreg Pocket Jig. I needed the smaller K3 for my 1x6 and the larger Kreg Jig for the 4x4's and 2x4's


I used 1x3's on the sides of the table instead of 2x4's that are in the plan. I wanted to avoid gaps on the edges since there is a lot of food in this area with kids. Another option would be to find a high quality 2x4 which would give it a more chuncky appearance but that would add a lot more cost to the table. 
You can see the 1x3 on the table edge
This is the side of the table from another angle


For the benches I used 2x4s for the edge rather than the 1x3 like I did on the table. It made the bench very sturdy and it would take a lot for a kid to turn this bench on its side(I've had that happen before with other benches :) 
The picture below is of the bench. You can see the difference of using a 2x4 for the edge.


Final finish for the tops of the table and benches: I stained and used 6 coats of tung oil. Loved the matte finish, very smooth and the grain of the wood still pops through. It's also waterproof. We accidentally tried this out when my kids left a wet cloth on the table over night....no damage :)

Legs: I Chose a distressed look. This takes a few more steps
Step 1: Sand and fill all the holes. I used a combination of caulk and wood filler. Since the 4x4 and 2x4 for the legs are not the best quality wood there is a lot of filling. If you're planning to stain them then you'd have to use some type of filler that can be stained or leave the gaps and have it look a lot more rustic. 

Step 2: Stand with any kind of dark stain. This is the color that will pop through your paint

Step 3: Paint( I used a flat paint since I wanted a more matte finish)

Step 4: After paint dries use sand paper to distress the areas you want the color to pop through.

Step 5: use polyacrylic or wax paste for sealing the wood. This will enable you to clean and wipe off the legs when you need to


Slight distressing on the main beam on the bottom of the table.